What's New

Follow new updates and improvements to Netcore CE.

Enhancement

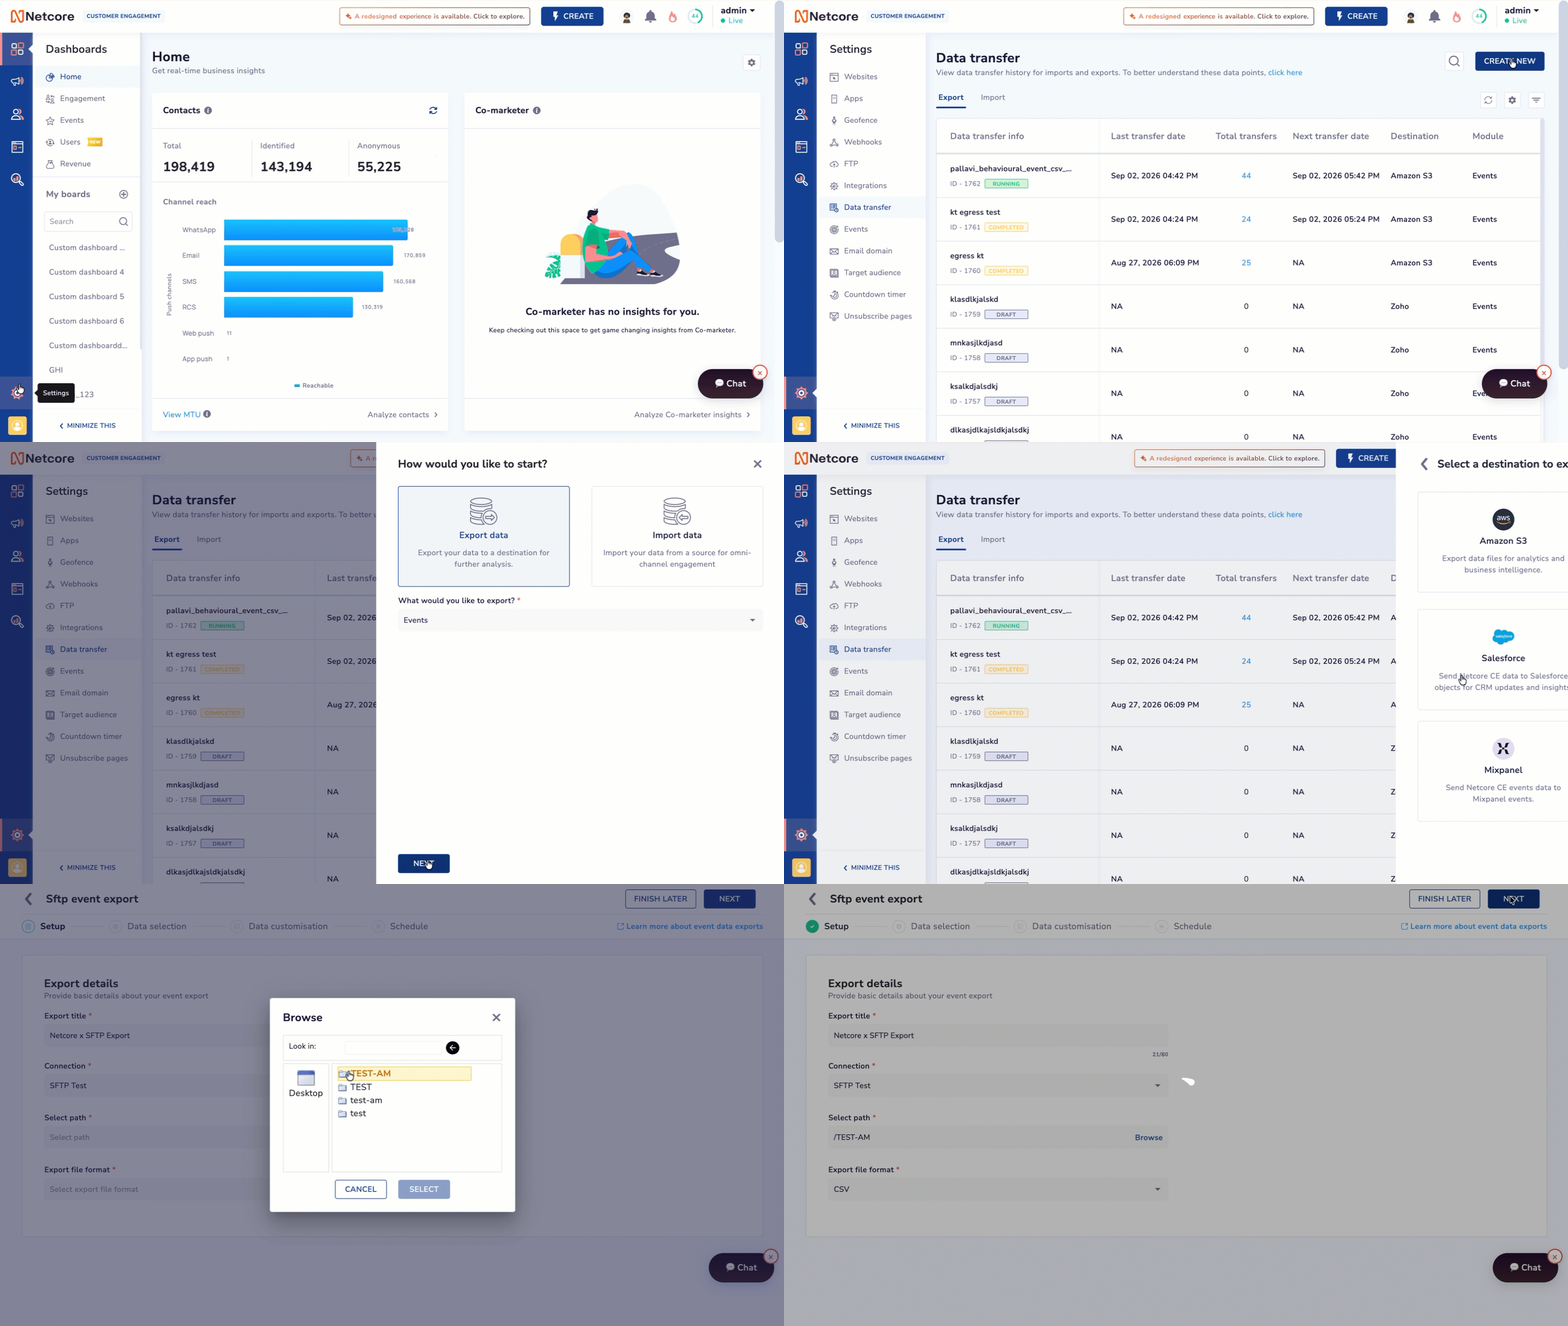
Export Netcore Events Straight to Your SFTP Server

Schedule Netcore CE event data to export directly to your own SFTP server, in the file format your pipeline already reads.

What’s New

  • Added SFTP as an Egress Data Transfer destination. Pick a connection and target directory in a few clicks.

  • Added three export formats: CSV, JSON, and Parquet.

  • Added data transformations: mask fields, rename columns, convert field types, reformat dates.

  • Added Send Test Data to validate your setup with a sample file.

  • Added flexible scheduling: set start/end dates and frequency (Hourly, Daily, Weekly).

Why It Matters

  • Pick the format your systems already read: CSV, JSON, or Parquet.

  • Mask and reshape sensitive fields before data leaves Netcore.

  • Validate with sample data first, then let the schedule run on its own.

Prerequisites: a pre-configured SFTP connection under Settings > Integrations; supports standard and behavioural events with Standard or Consolidated schema.

Navigate to Settings > Data Transfer > CREATE NEW, select Export data > Events, and choose SFTP to start scheduling exports.
Read the documentation to know more.

New Feature

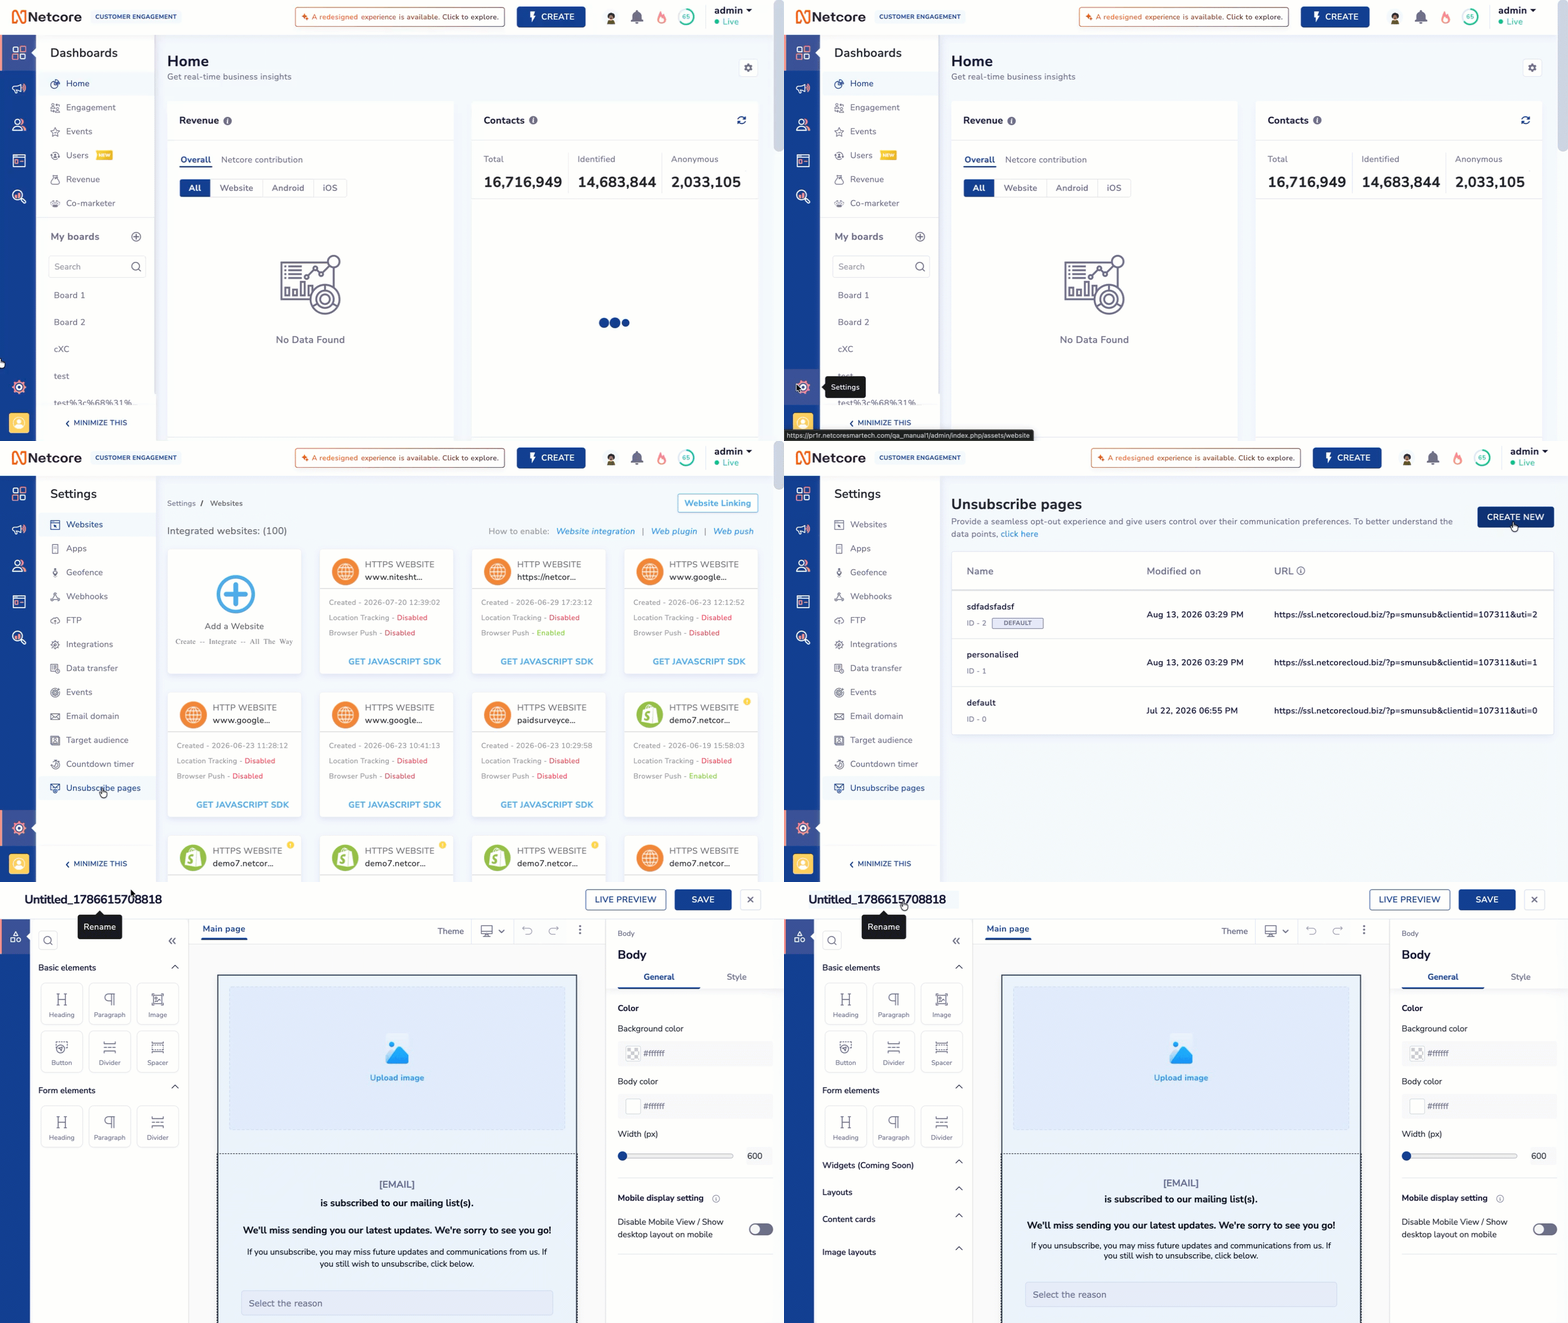
Custom Unsubscribe : Give Your Customers a Better Way to Opt Out

Until now, clicking the unsubscribe link in your email took users to the default Netcore unsubscribe experience.

Now, you can replace that default link with your own unsubscribe page. Build an experience that matches your brand, collect feedback on why users are leaving, or give them the option to manage their communication preferences instead.

What’s New

  • Added support for a custom unsubscribe link that replaces the default Netcore-generated unsubscribe link.

  • Let users land on your branded unsubscribe page instead of a standard unsubscribe experience.

  • Use your custom page to collect unsubscribe feedback and understand why users opt out.

  • Give users a preference center option so they can adjust their communication preferences instead of unsubscribing completely.

  • Manage the unsubscribe process and redirect users to your custom landing page after they click the link.


Why It Matters

  • Keep your brand experience consistent: Extend your brand identity to the unsubscribe journey.

  • Understand why users leave: Collect feedback when users choose to unsubscribe and use those insights to improve your email strategy.

  • Retain subscribers: Offer communication preferences for users who want fewer emails instead of opting out completely.

  • Stay in control: Manage the unsubscribe experience and landing page based on your business requirements.

Read the documentation to know more.

New Feature

Stop Losing Subscribers Over One Type of Email

Until now, email unsubscribe was mostly all or nothing. A user who wanted to stop receiving promotional emails had to unsubscribe from everything, including important updates.

Now, Subscription Management lets you give recipients control over what they want to receive. Create subscription categories, group related preferences, and give users a branded preference page where they can choose what stays in their inbox.

What’s New

  • Added subscription categories to let recipients opt in or out of specific types of email.

  • Added groups to organize related categories and keep the preference page easy to navigate.

  • Added a customizable preference page where you can add your logo, background color, font, headline, body text, categories, and groups.

  • Added a mandatory Unsubscribe from All option for recipients who want to stop all email communication.

  • Automatically pre-fill the preference page with each recipient’s existing choices.

  • Added preference data as user attributes, so you can build segments based on the categories users have selected.

  • Added support for secure, token-based access to the preference page without requiring users to log in.


Why It Matters

  • Give users more control: Let recipients choose which emails they want instead of forcing an all-or-nothing unsubscribe.

  • Reduce unnecessary unsubscribes: Users can opt out of promotions while continuing to receive important transactional or service updates.

  • Keep your brand consistent: Customize the preference page with your brand elements and messaging.

  • Turn preferences into targeting data: Use subscription choices to build target or suppression segments for future campaigns.

  • Make preference management simpler: Users can update their choices directly from the email without logging in.


Limits to know: You can create up to 25 active subscription categories and 10 groups. Preference changes sync to segments within up to 6-12 hours.

Prerequisites: Preference Page is currently available as a controlled release and must be enabled by Netcore’s SRE team. GA release will be available soon. To enable Preference Page, contact your Netcore Account Manager. Once enabled, create and configure your subscription categories and preference groups in Subscription Management. Use the generated Preference Page URL as the unsubscribe link in your email template. When users click the unsubscribe link, they will be redirected to the Preference Page to manage their subscription preferences.

Customers are responsible for using the user’s preference values to build the target audience for campaigns and ensuring that emails are sent only to users who have opted in to the relevant subscription category.

On the CE dashboard, navigate to Settings > Preference Page to configure your subscription categories, groups, and preference page.
Read the documentation to know more.

New Feature

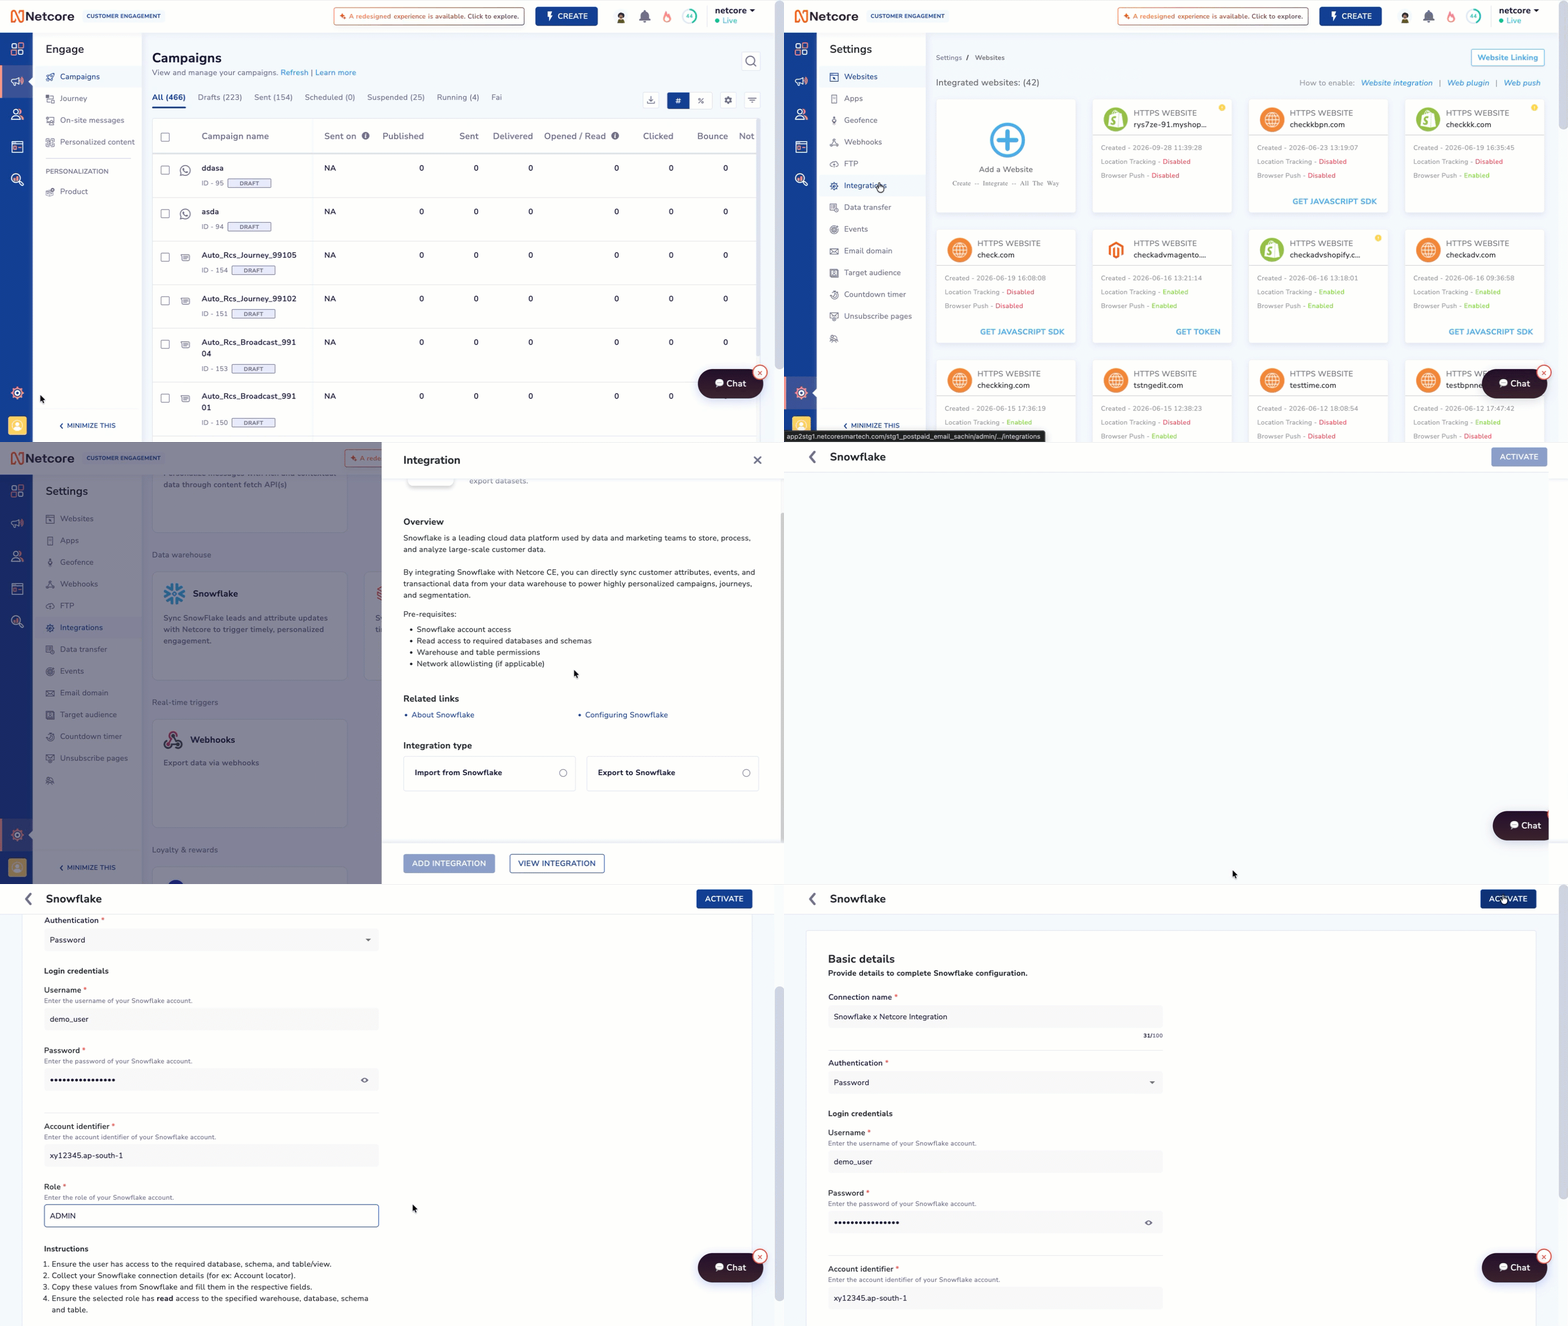
Import Data from Snowflake to Netcore CE

Until now, bringing data from Snowflake into Netcore CE required additional data movement or integration workflows.


Now, you can connect Snowflake with Netcore CE and import data directly into your CE panel. This helps you use data stored in Snowflake for customer engagement and personalization.

What’s New

  • Added Snowflake as a data source for importing data into Netcore CE.

  • Connect your Snowflake account and configure the data import.

  • Import data from Snowflake into Netcore CE for use in customer engagement.

  • Manage the data transfer without manually exporting and uploading files.


Why It Matters

  • Bring data from your existing Snowflake warehouse directly into Netcore CE.

  • Reduce manual data movement between platforms.

  • Use centralized customer data to power more relevant engagement.

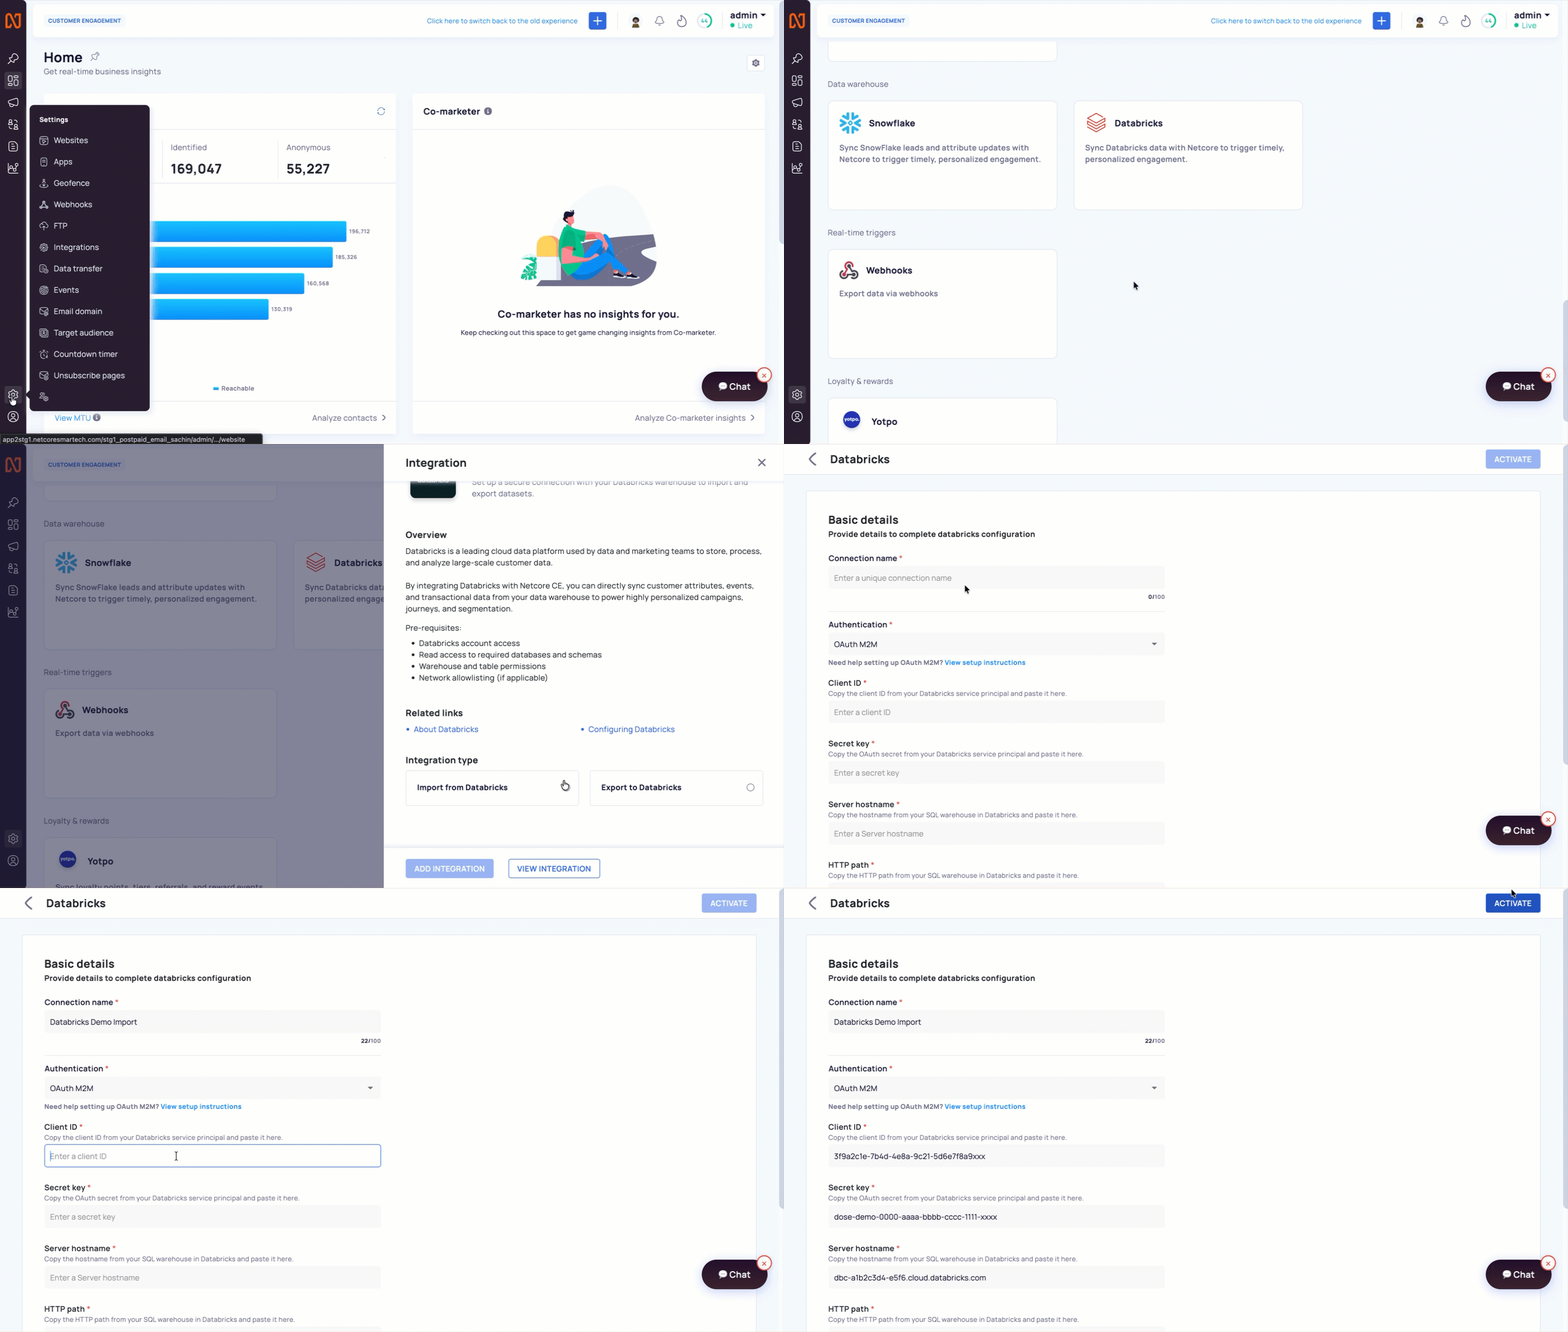
Navigation: Settings > Integration > Snowflake


Refer to the documentation to know more.

Enhancements

Reach Window Shoppers Before Checkout With the Nitro Integration

Until now, visitors who browse and leave before entering contact details stay anonymous. You cannot reach them.
Now, NitroX (Nitro Commerce) identifies these visitors through cookieless tracking. It sends their profiles and website events to Netcore CE for pre-checkout campaigns.

What’s New

  • Added a Netcore integration in NitroX. It sends identified visitors to Netcore CE as contacts.

  • Added 12 website events, such as nitro_product_view, nitro_addtocart, and nitro_orders/create. You choose which events NitroX sends.

  • Use nitro_events and the NITRO_ID attribute in segments and Journeys.

  • Set up with no website code changes.

    Why It Matters

  • Reach intent early: trigger browse abandonment, cart recovery, and checkout drop-off Journeys.

  • Keep profiles clean: pick a Primary Identifier (Phone Number, Email, or Anon ID) that matches your Customer ID.


Prerequisites: a NitroX account; your Netcore account team enables data sharing with Nitro Commerce.
Best fit: D2C and retail brands.

Set it up in 4 steps

  1. In NitroX, go to Integrations > Netcore.

  2. In Netcore CE, copy the API key (Profile > User Profile) and the Asset ID (Settings > Website). Paste both into NitroX.

  3. Select your Data Center (it must match Netcore CE), your Primary Identifier, and your events. Phone numbers need the country code.

  4. Click Save and confirm the Connect with Netcore toggle is on.

    Refer to the documentation here:

Organize, Discover, and Reuse Email Templates Faster Than Ever

Managing large template libraries just got a whole lot easier. The revamped Email Content experience introduces a unified Template Gallery, Saved Templates, and Folders view, making it simple to find, organize, and reuse templates from one place.

What's New

  • One unified template workspace with Template Gallery, Saved Templates, and Folders in a single experience.

  • New Folder support to organize templates at scale, while Categories continue to work as flexible tags.

  • Powerful search and filters to quickly find templates by name, type, category, creation method, usage, or last edited date.

  • Bulk actions to move, categorize, or archive multiple templates in a single click.

  • Smarter template management with built-in safeguards that protect templates already in use.

  • Consistent creation experience across HTML and AMP templates, with streamlined editor selection and updated editor names.

  • Improved template reuse, including automatic copies of system templates so the originals always remain intact.


Whether you are managing a handful of templates or thousands, the new experience helps your team stay organized, collaborate more efficiently, and launch campaigns faster.


Refer to the complete documentation here:

We've received a few queries through Docbot and from our support teams regarding the Upload HTML option seemingly disappearing after the Email Content Section revamp.

Just to clarify, the functionality has NOT been removed or changed. It has simply been reorganized under the Code Editor as part of our new, streamlined Email Content experience.

Here's how to upload an HTML file in the new UI:

  1. Navigate to Content → Email.

  2. Under Create a new template, select HTML.

  3. Choose Code Editor.

  4. Click Import within the editor.

  5. Select Upload HTML File.

  6. Choose whether to Keep image links as-is or Download & host images.

  7. Upload your HTML file and click Proceed.

    Important: This is purely a UI/navigation change. All existing HTML upload capabilities remain available, including the ability to import HTML files and manage image hosting preferences.

Bring Merchandising Alerts to WhatsApp

Turn key product moments into personalized WhatsApp messages with Merchandising Events by automatically notifying users when products experience a Price Drop, Back in Stock, Stock Running Out, or New Arrival event using existing merchandising and catalog data.

What’s New

  • Four Merchandising Triggers: Support for Price Drop, Back in Stock, Stock Running Out, and New Arrival.

  • Product Personalization: Use product attributes such as title, price, discount, availability, and quantity changes across the message and CTA.

  • Automatic Product Selection: The latest qualifying product is selected when the trigger fires and its data is captured for the message.

  • Existing Setup: Reuses the existing Merchandising Trigger engine and Product Catalog Integration with no additional merchandising configuration.


Important to Know

  • Supported only on Rich Media Dynamic templates and Journeys.

  • Only one product is sent per message. Ranking and multi-product rendering are not supported.

  • Product data is captured at trigger time and is not re-evaluated before delivery.

Turn price drops, restocks, and new arrivals into timely WhatsApp conversations without building manual campaigns.

Refer here for the documentation.

Turn Product Changes into Timely App Push Notifications

Bring merchandising-driven product alerts to App Push with Merchandising Event in Product Set. Automatically surface products triggered by Price Drop, Back in Stock, Stock Running Out, and New Arrival events using the existing Merchandising Trigger and Product Catalog setup.

What’s New

  • Four Trigger Types: Support for Price Drop, Back in Stock, Stock Running Out, and New Arrival.

  • Automatic Product Selection: Render up to 5 qualifying products in a notification.

  • Personalized Product Content: Use product attributes such as price, discount, availability, and quantity changes.

  • Existing Setup: Reuses the existing Merchandising Trigger and Product Catalog Integration with no additional configuration.


Important to Know

  1. A Merchandising Trigger must be configured, and Product Catalog Integration sync must be active.

  2. Products are captured at trigger time and are not re-evaluated before delivery.

  3. A product must have an Image URL to render.

  4. Product order is determined by the Merchandising Engine and is not changed by App Push.

Turn price drops, restocks, and new arrivals into timely App Push notifications without rebuilding campaigns.

Refer to the documentation here.

Make Trends More Actionable

Trends now gives marketers more control over audience analysis, performance comparison, and trend exploration, making it easier to spot changes and uncover the dimensions driving performance.

What’s New

  • Compare to Past: Overlay previous-period trends and compare performance across the previous day, week, month, quarter, half year, or a custom date range. Percent changes automatically follow the selected granularity.

  • Advanced Audience Selection: Include or exclude up to 5 lists or segments in the main filter. Multiple selections are combined into a single audience for analysis.

  • Compare Audiences: Compare up to 2 additional audiences alongside the base audience, with up to 3 series displayed together across charts and tables.

  • See Deeper Trends with Multi-Property Splits: Get a more complete view of trend performance by breaking down data across four properties at once. Select up to two properties in Split By and use two-property drill-downs to uncover patterns across combined dimensions.

  • Better E-commerce Insights: For example, split Product Views by Device Type and Product Category to compare combinations such as Mobile | Electronics and Web | Fashion.

  • Richer Analysis: Audience context now applies across charts, tables, split by, and drill-down views for all supported Measure By options.

  • Clearer Trend Views: Trend series use visually distinct colours, while Total Events per User now displays values to 2 decimal places.

  • Independent Event Splits: In multi-event trends, selected properties continue to apply independently to each event.

  • Existing Views Stay Intact: Saved trends and dashboards using a single-property split continue to work as before.

Together, these updates make it easier to compare audiences, spot changes over time, and uncover the dimensions behind performance—turning Trends into a more actionable tool for everyday analysis.
Refer here for the documentation.

A/B Testing for Web Personalization

Optimize web experiences with data-driven experimentation

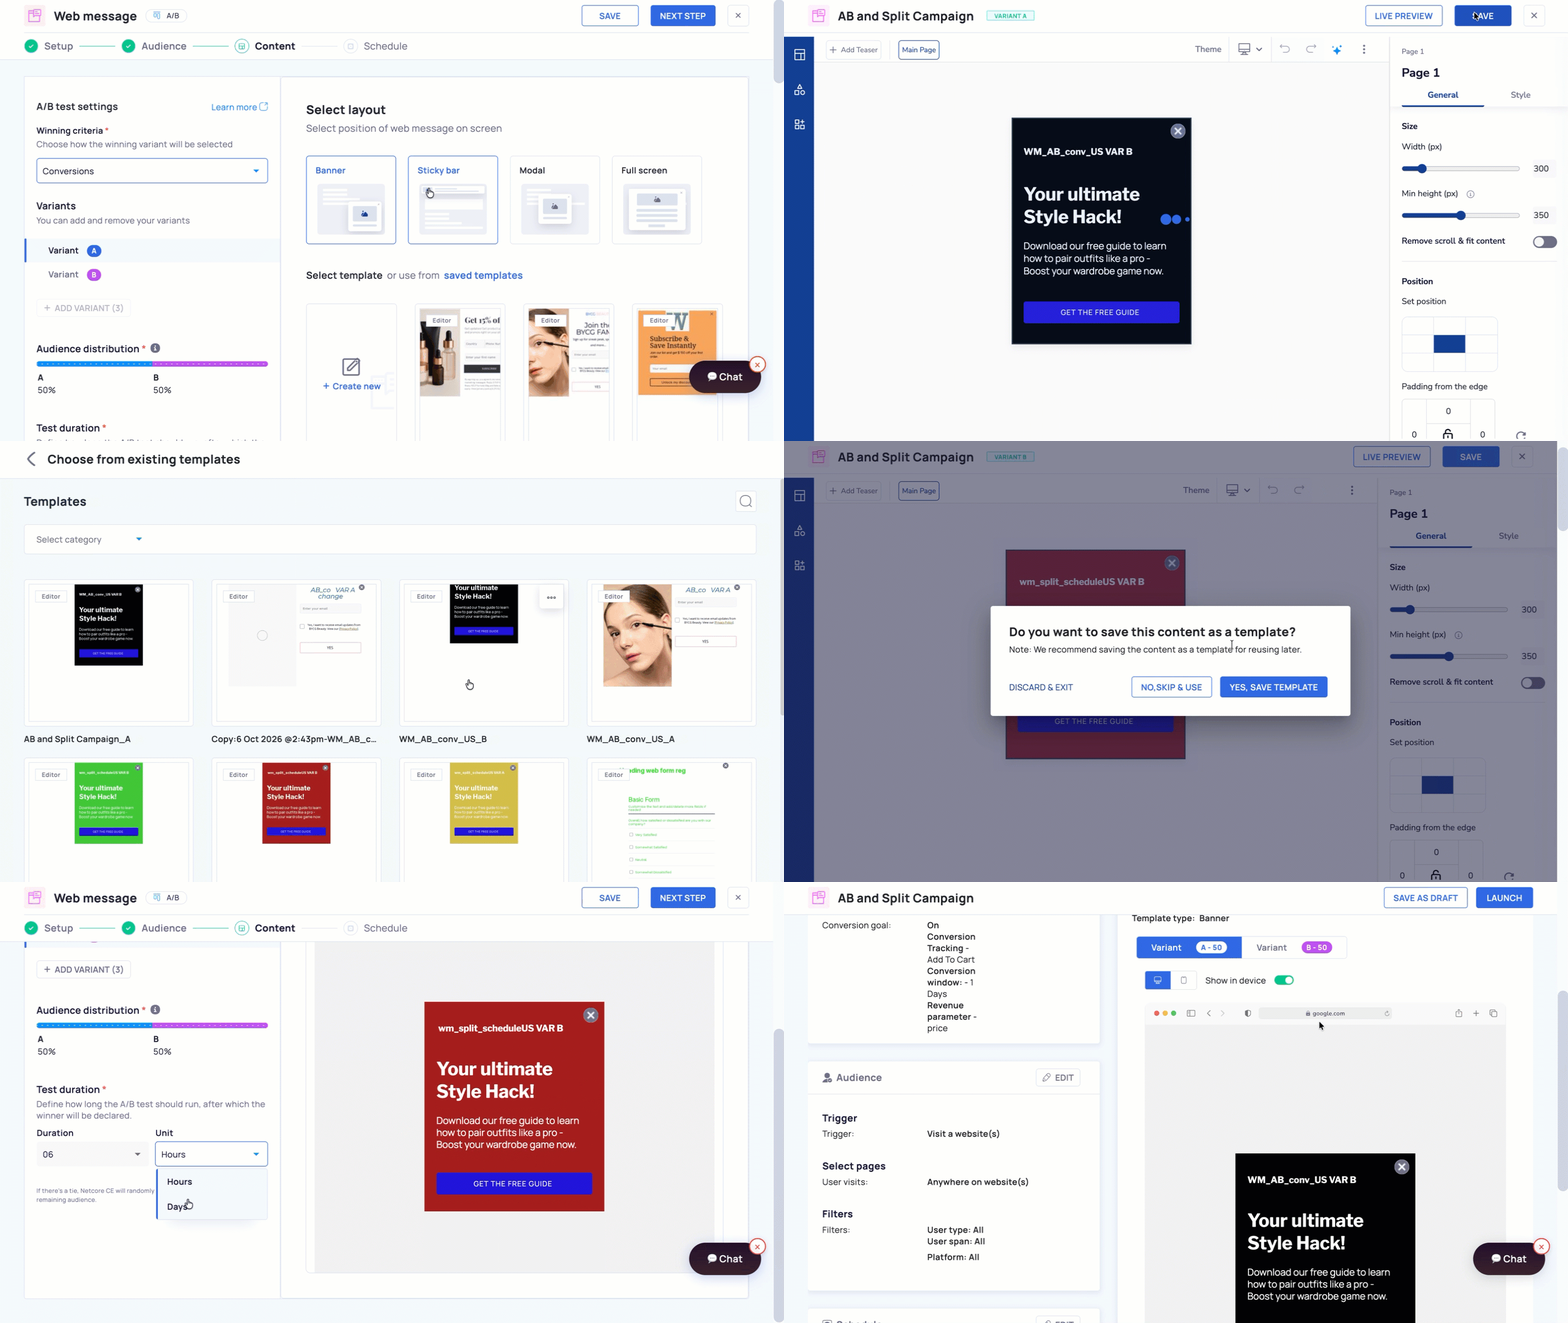
A/B Testing for Web Personalization makes it easier to compare different versions of a web experience and identify what drives better engagement. Create two to five variants, define a winning metric, and run a controlled experiment with a control group. Once the test ends, Netcore automatically identifies the best-performing variant and serves it to the remaining audience.

What’s New

Test multiple experiences: Create and compare 2–5 variants within a single Web Personalization campaign.Choose what defines success: Select Clicks or Conversions as the winning criterion.

Include a control group: Compare personalized experiences against a baseline experience to measure impact. Consistent user experience: Users are consistently assigned to the same variant throughout the experiment.

Automatic winner rollout: Once the test window ends, the highest-performing variant is automatically served to the remaining audience. Variant-level reporting: Track impressions, clicks, and conversions for each variant and compare performance with the control group.

Experiment versioning: Editing a running campaign starts a new experiment while preserving historical results from the previous version.

Refer here for documentation